

PKCE Authorization with Okta and JMeter
PKCE Authorization with Okta and JMeter

Abraham Sultan
Abraham Sultan March 22, 2021
If you’ve read our blog in the past, you know that strong engineering practices put a lot of emphasis in test automation. In this article we are going to focus on load testing an API that is being authorized with OAuth 2.0. In particular this article uses Okta for Auth and JMeter as the load testing engine.
Oauth Authentication is a complex topic that is outside of the scope of this article but most of the topics described in this article should be fairly easy to follow even for those with minimum background and understanding of how Oauth works.
Okta provides a great deal of resources for those that are just getting started with Authentication and the following article describes several of the common flows that you will encounter.
To help set the stage, the following flowchart demonstrates the request flow that typically happens between the different parties involved in the Authorization Flow when PKCE (Proof Key for Code Exchange) is involved.
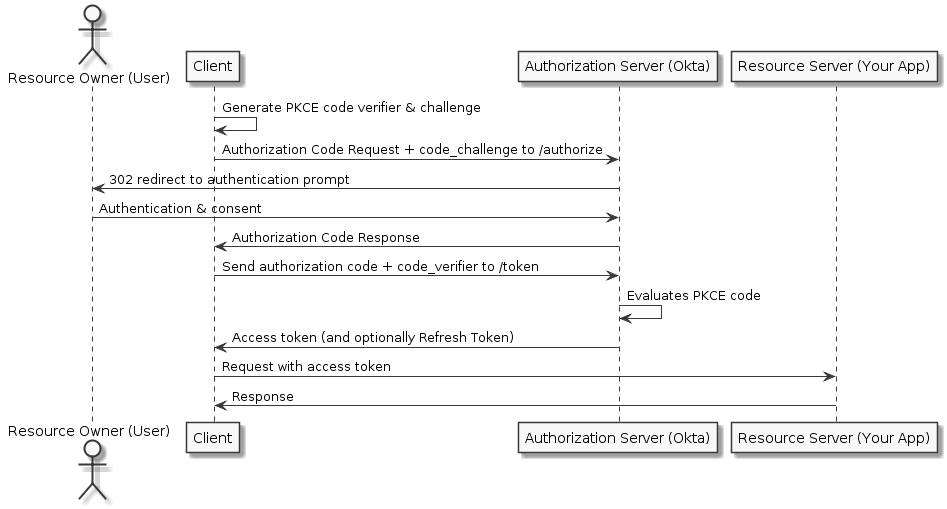
Diagram compliments of the Okta docs.
At a high level the above process can be broken down into the following 3 steps:
-
Start the flow by making an “authorize” call and getting a state token
-
Get an authorization code by authenticating to Okta by logging in with credentials and MFA authentication
-
Get a bearer token to be used in subsequent API requests for the API
Hack Warning!
You will notice from the steps outlined below that you will need to provide a value for stateToken in some of the API calls. In full disclosure, the way the stateToken is retrieved, feels like a hack but despite our best efforts to find out an alternative on how to source it, this was the only way we found how to get it. If others reading this article have a better alternative, we invite you to please share it with us!
PKCE Code Challenge & Verifier
This flow requires the usage of a code challenge and a code verifier as part of the proof key for code exchange protocol. In theory your application is responsible for generating both the challenge and verifier that will be used in the Auth process. There are many projects online to help with this but for the sake of simplicity and for the purpose of our load test, we can use a previously created challenge and verifier for all of our requests. This is a handy online tool that can be used to create both. Just make sure to generate a verifier code first and then generate a challenge.
As an example:
| Verifier | Challenge |
|---|---|
| eb9f29168f4ece4ee3231728fbeb37461a382ae4ed6 | 0b2ZRgAQQePjqCWuIUZgMtS7S6VC11tq4pF0xKaNQh8 |
URLs Involved:
For our scenario there are 3 distinct URLs that are involved in the Authentication process and this is not unlike most load testing scenarios so let me call out what they are here:
| URL | Description |
|---|---|
| APP_URL | This represents the domain name for your application, this is normally needed as part of the callback url for your application which is a required parameter when making your authorization calls. |
| AUTH_URL | This is the URL for your auth server which in our case it is Okta. From your Okta portal, you can find this URL by looking at the settings of a new application. |
| API_URL | Similar to the APP_URL, this represents the domain name for our backend API which may be similar to the APP_URL but in our case it is under a different subdomain. This is represented as the Resource server in the above diagram. |

AUTH_URL
JMeter User Variables
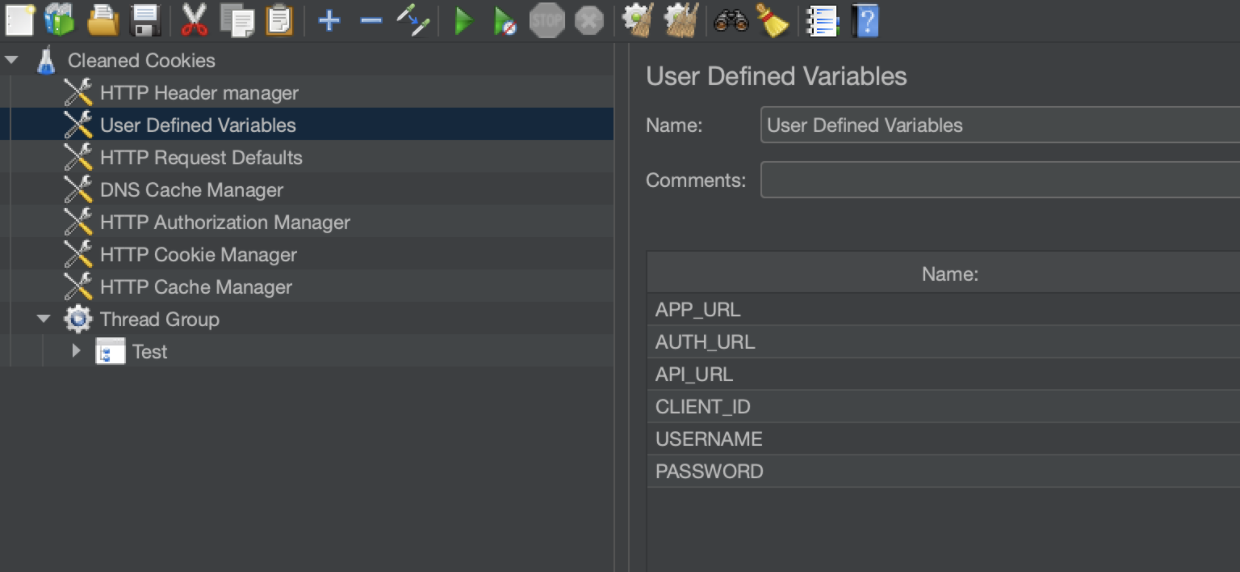
As part of this tutorial we will reference a set of globally defined user variables in JMeter that make it easy to point this suite against any other environment. The variables look like this:
-
The 3 URLs were covered in the previous section,
-
We will cover CLIENT_ID in the next section
-
Username & Password are the credentials for the user trying to login
Now that we have all dependencies laid out, let’s proceed to the Authentication Dance!
Authorize Call
The first step is to make the Authorize call against our Okta server. The JMeter request looks something like this:
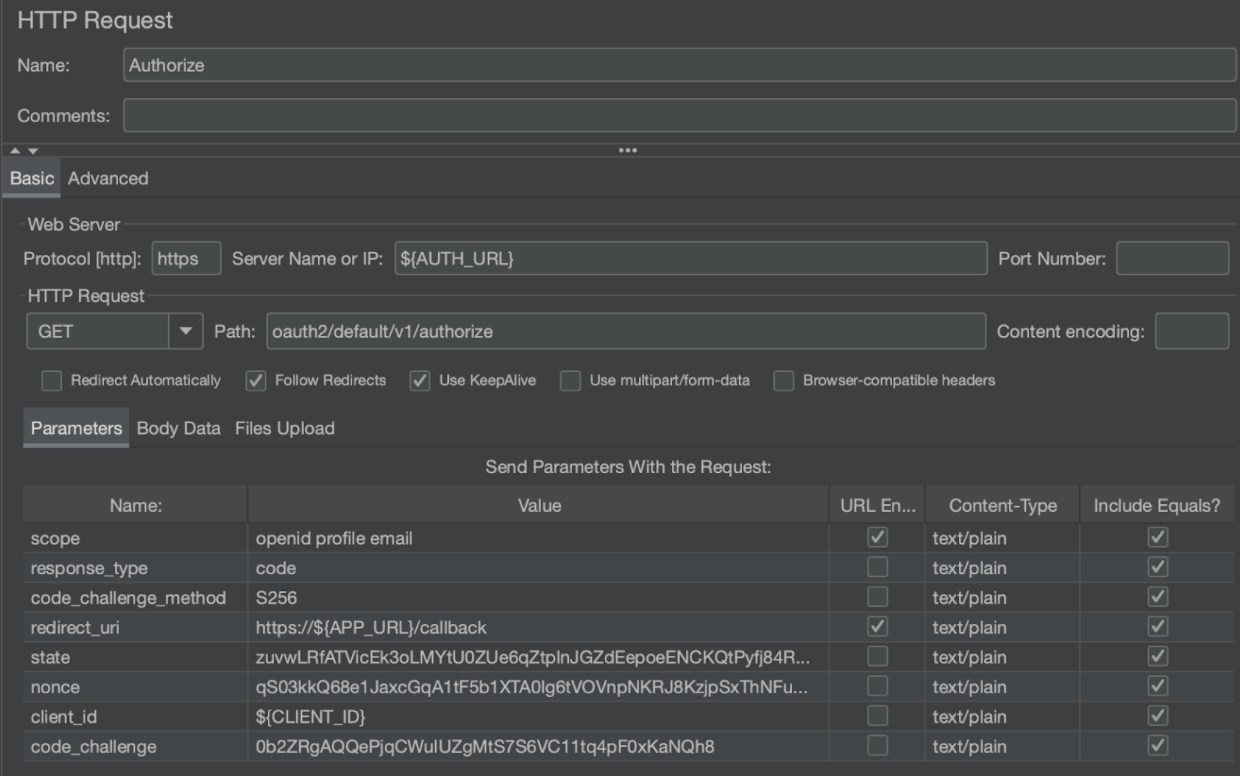
Let’s cover what the request parameters mean:
| Parameter | Description |
|---|---|
| scope | The important value in this parameter is openid which means that the /token endpoint returns an ID token. For more detail on the additional scopes, see at bottom of table. |
| response_type | Should be code, indicating that we are using the authorization code grant type. |
| code_challenge_method | Is the hash method used to generate the challenge, which is always S256. |
| redirect_uri | Is the callback location where the user agent is directed to along with the code. This must match one of the Login redirect URIs that you specified when you were creating your Okta application. The notation ${APP_URL} is to reference a global variable that was defined in JMeter for the value of APP_URL. You will notice this pattern used in several of the fields to reference the called out variables. |
| state | Is an arbitrary alphanumeric string that the auth server reproduces when redirecting the user agent back to the client. This is used to help prevent cross-site request forgery. |
| nonce | Another arbitrary alphanumeric string that is returned in the ID token. It is used to mitigate replay attacks. |
| client_id | Matches the Client ID of your Okta OAuth application. You can find it at the bottom of your application’s General tab. |
| code_challenge | Matches the challenge you created in the previous step. |
For more detail on the additional scopes, see here
The response from the above request, returns a payload that includes the state token embedded in its source code. We need to extract this value as it is needed in subsequent requests. To achieve this, we use a Regular Expression Extractor:
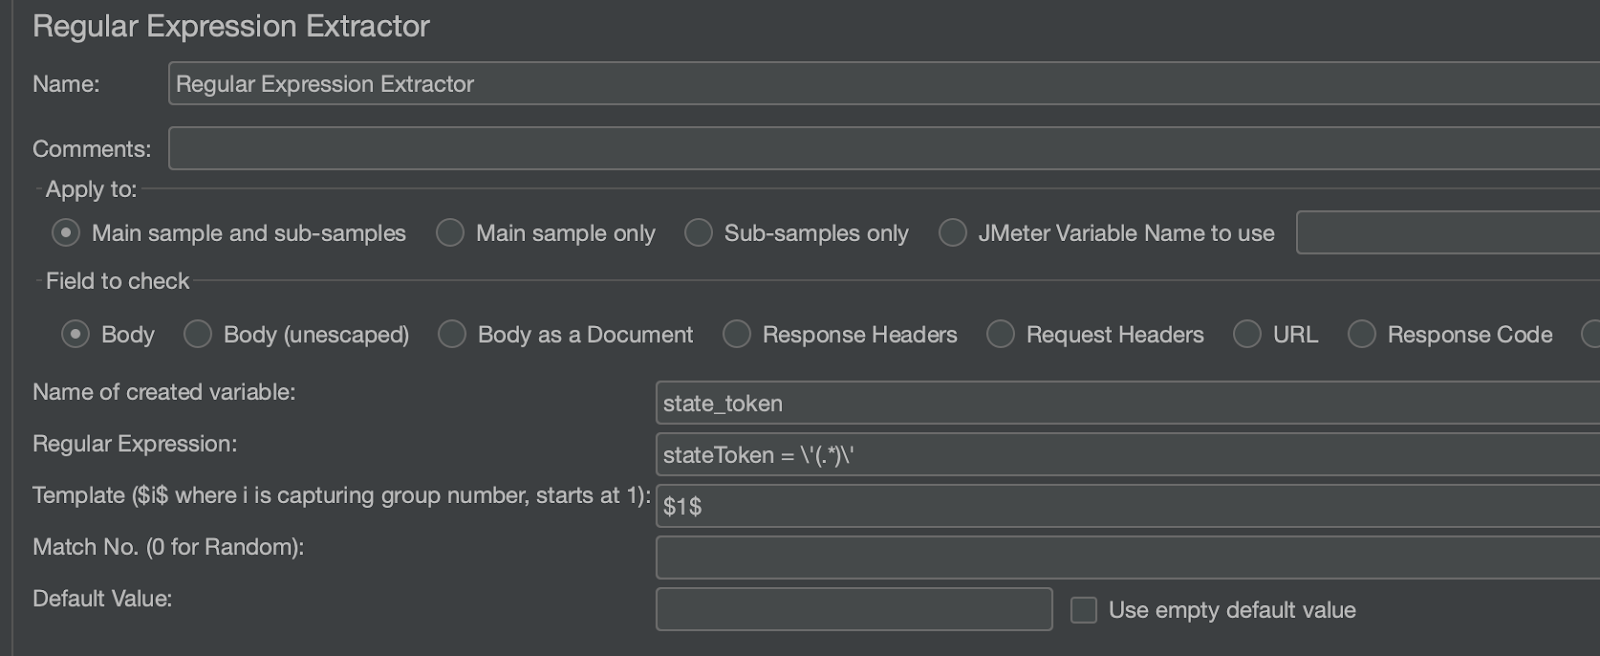
This will capture the stateToken value from the body of the response and save it in a user variable called state_token. You will notice that this value may be ASCII encoded so we use a BeanShell PostProcessor to change the encoding back and save it to a new user variable called decoded_state_token:

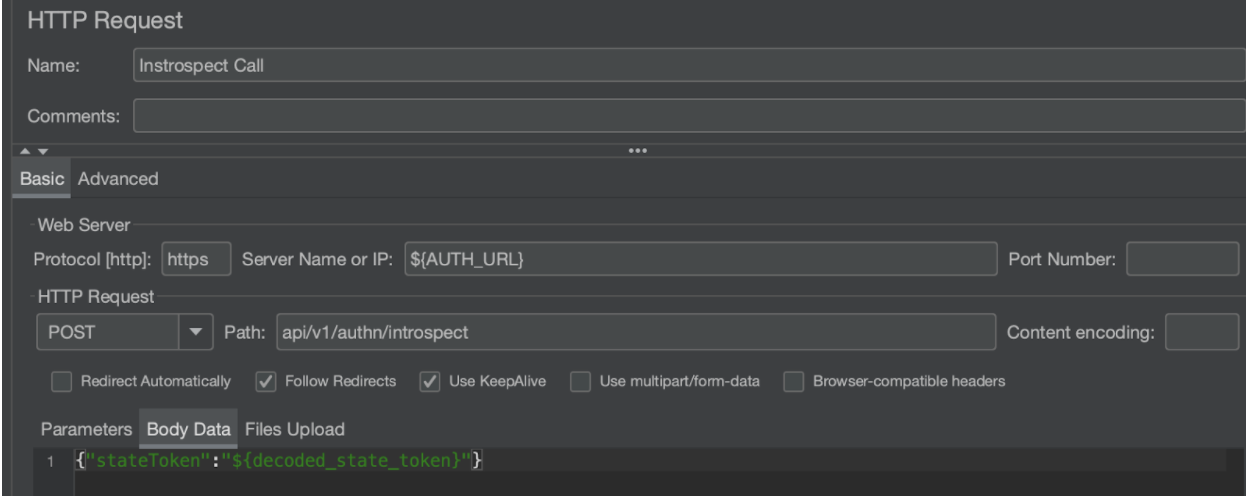
Introspect Call
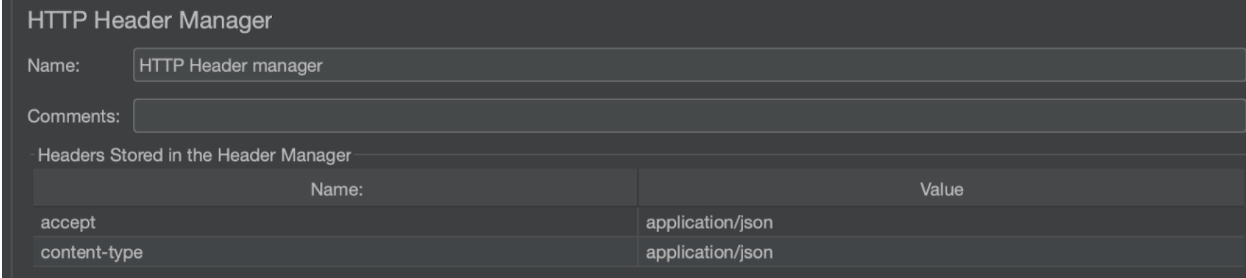
The next step is technically optional but it’s included in this example for good measure. After making the Authorize call, it is recommended to check if the stateToken is active which can be achieved with an Introspect call. When the token is active, additional data about the token is also returned. If the token is invalid, expired, or revoked, it is considered inactive. This call requires a JSON payload so in addition to the standard HTTP request, we use an HTTP Header Manager to include the accept and content-type headers
Login Call
At this point we are ready to log in using our credentials. But before doing that, let’s recap what we’ve done so far:
-
Call Authorize to begin the authorization process
-
Use a regular expression extractor on the response body to extract the stateToken
-
Use a bean shell post processor to decode the ASCII encoded characters
-
-
Call Introspect to validate that the stateToken is valid
-
Configure HTTP headers using a Header Manager to specify the accept and content-type headers to support JSON
-
To login, we call post credentials to the auth endpoint like this:
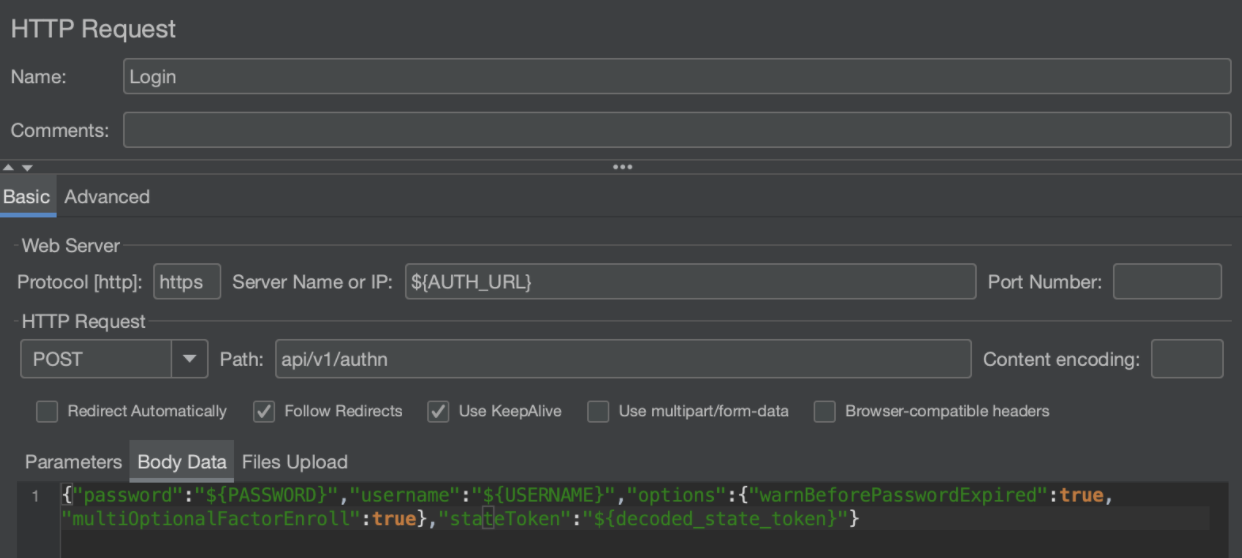
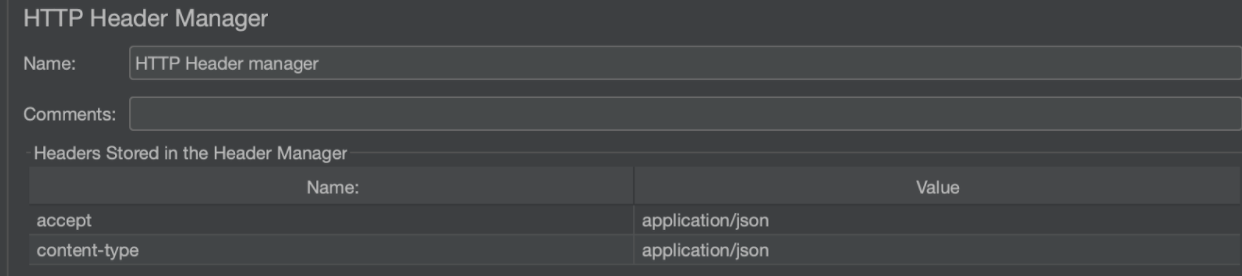
Don’t forget to include the proper headers to post and receive json data as such:
Step Up MFA
The next step in the authentication dance is to perform step up multi-factor authentication. If you are not familiar with MFA, you can read more about it here but in short, Step-up MFA is a pattern commonly used to ensure the user is who they say they are before a sensitive operation is performed.
To do this, we make a call to the step-up/redirect endpoint as such:
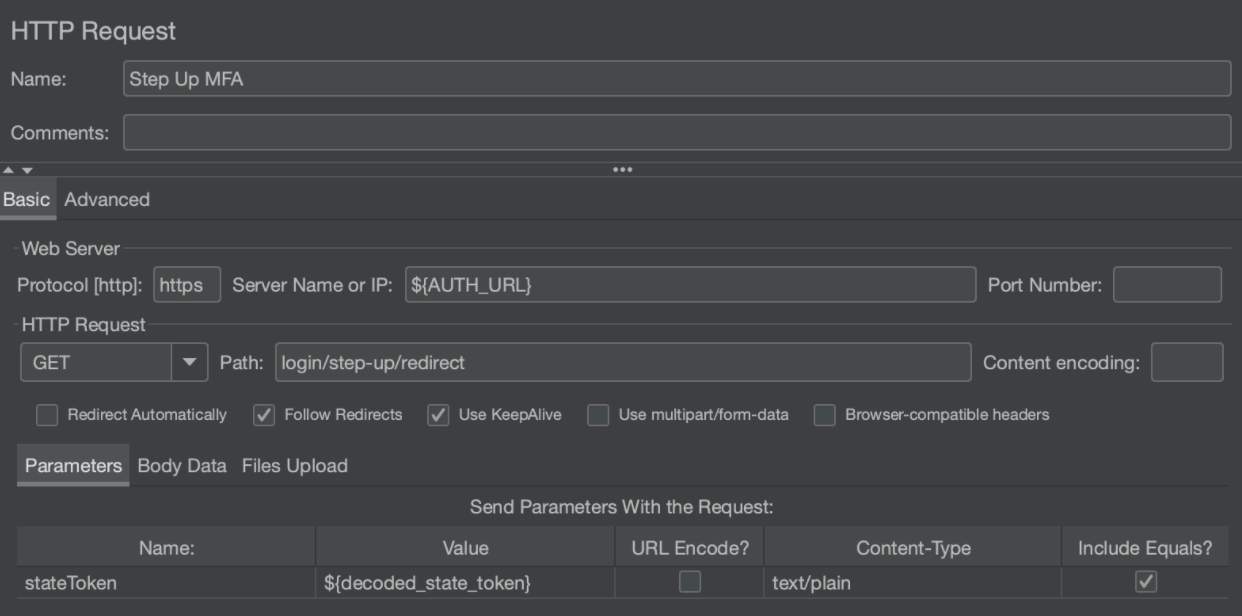
This call will respond with a redirect that will include the authorization code as part of the response URL.
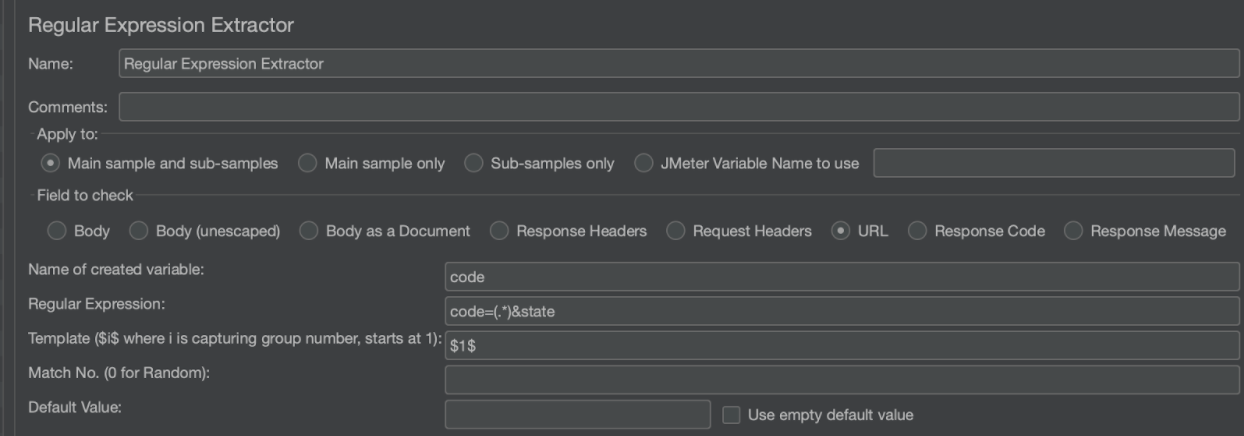
In order to extract the code from the response, we can use a RegEx extractor that looks like this: Notice how the field we are checking this time around is the URL and we are creating a new variable called code that will be used in the subsequent call.
Get Tokens
The final call of the authentication dance is to get a bearer token so it can be used in subsequent requests to your API. To do this, you POST to the authorization server on the /token endpoint with the authorization code retrieved in the previous step in addition to a few other parameters described below:

Let’s cover what the request parameters are in more detail:
| Parameter | Parameter Description |
|---|---|
| code | This is the authorization code that was extracted from the response in the previous step. |
| grant_type | Should be authorization_code, indicating that we are using the authorization code grant type. |
| redirect_uri | Similar to the Authorize call, you must provide the redirect_uri which is the callback location where the user agent is directed to along with the code. This must match one of the Login redirect URIs that you specified when you were creating your Okta application. |
| client_id | Matches the Client ID of your Okta OAuth application. You can find it at the bottom of your application’s General tab and it is the same value you used during the Authorize call as well. |
| code_verifier | Matches the verifier code you used to create the challenge in the first step of the tutorial. |
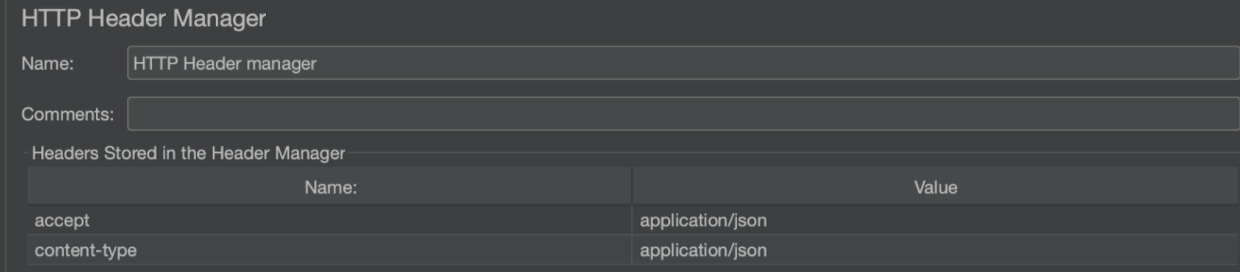
The response from this request will be in JSON so you will need to include an HTTP Header Manager like this again:
The final step is to extract the access_token from the response and save it in a variable so it can be used for subsequent API requests. This can be achieved with a JSON Extractor:
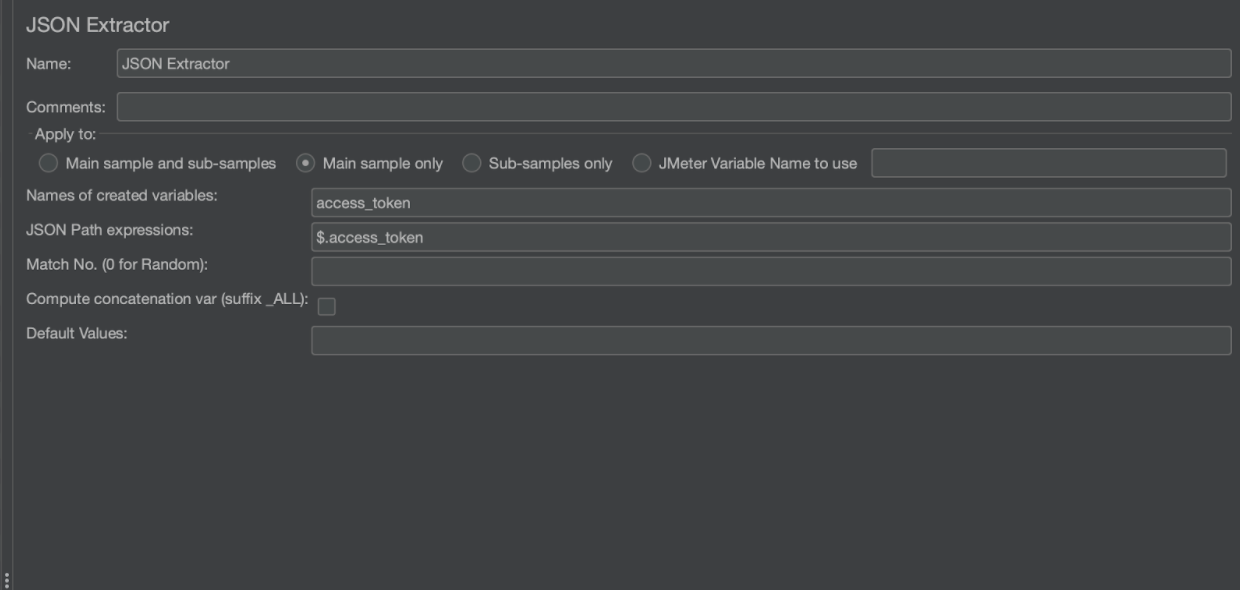
Boom! Now you are ready to call your APIs since you’ve completed the Authentication Dance.
Calling Your APIs
From this point on, you can call any endpoint in your API as long as you include an Authorization header with a bearer token which can be done using an HTTP Header Manager for your requests that look like this:

Conclusion
We just covered an approach to perform load testing for an application that is behind PKCE Authorization using Okta and JMeter; but you can use a similar pattern to call an API for any application that has a similar setup.
If you like what you read, and are passionate about solving hard challenges, we are hiring for many positions and we would love to talk to you about the difference you can make in our team!